Posted on 1 Comment

2007 Porsche 911 Carrera S M97 3.8L Engine Rebuild

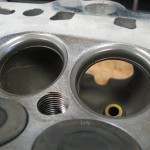
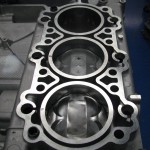
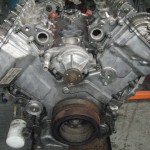
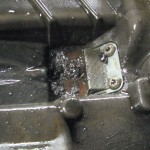
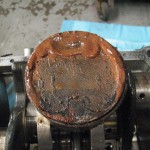
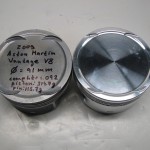
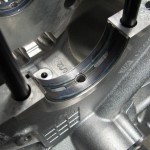
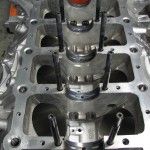
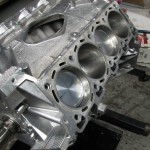
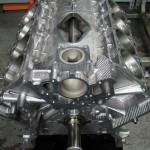
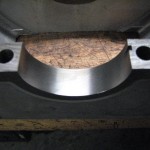
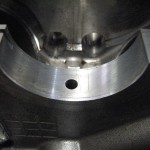
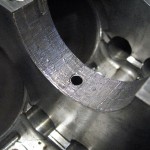
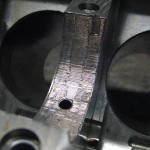
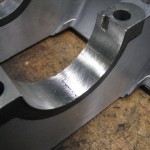
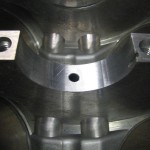
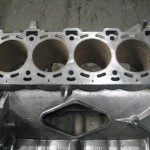
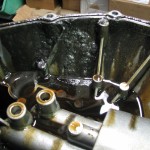
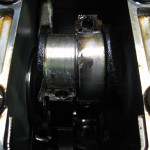
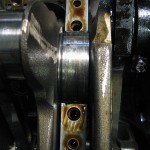
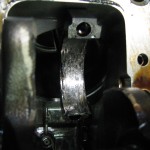
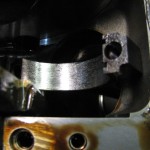
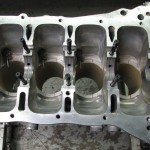
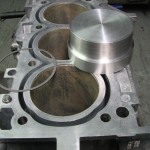
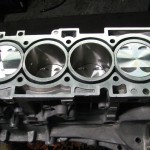
This is a 2007 Porsche 911 Carrera S engine rebuild performed last summer. Luxury auto dealer contacted us with an inquiry and consultation inquiry. They had a beautiful 911 Carrera on the lot. The car ran great without any sign of problems. One day upon engine start-up there was white smoke from the driver tailpipe and a light engine misfire. Upon vehicle inspection it was agreed the engine shall be removed for further investigation. Internal engine damage was anticipated and eventually found. Upon cylinder head removal on Bank 2 the damage was found. Cylinder 5 liner cracked from headgasket mating surface down to the base of the water jacket. The piston dome was washed out with coolant which also washed out oil lubrication on cylinder walls leading to piston skirt and cylinder bore scuffing.

The following work was performed to restore the engine of this beautiful machine to new condition:
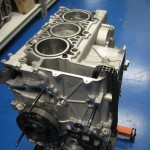
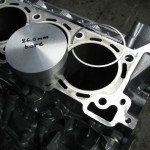
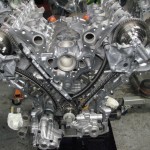
Cylinder Block:

  1. new cylinder block from Porsche
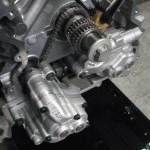
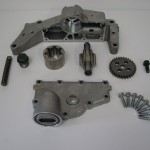
  2. oil pump disassembled, cleaned, inspected, gears and their clearances measured, compared to specification, found to be in good working order, lubricated with engine bearing assembly lube, reassembled, and installed on engine
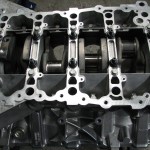
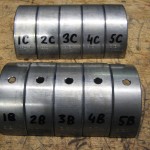
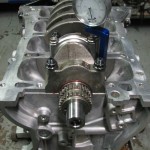
  3. new crankshaft main, rod, and thrust bearing from Porsche
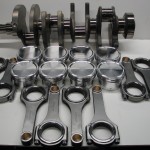
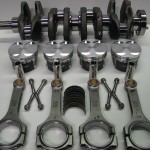
  4. all new piston rings from Porsche
  5. replace one piston with new unit from Porsche
  6. all miscellaneous o-rings, gaskets, head gaskets, and seals
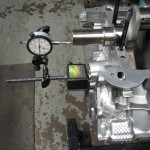
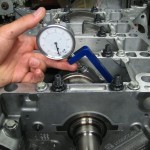
  7. all bearing clearances checked and recorded
  8. all piston to cylinder bore clearances checked and recorded
  9. all piston ring gaps checked and adjusted as necessary
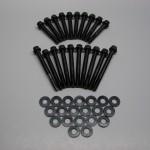
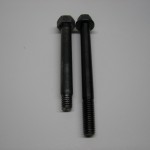
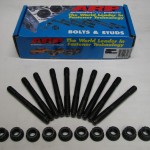
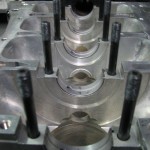
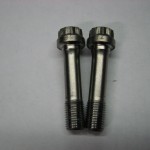
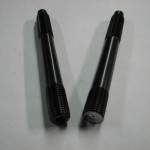
  10. new cylinder head bolts installed
  11. new crankshaft carrier bolts installed
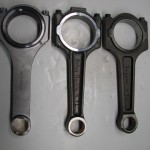
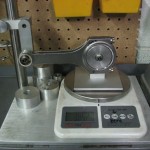
  12. new connecting rod bolts installed
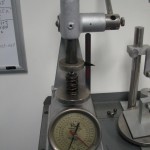
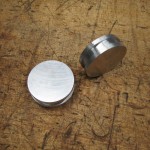
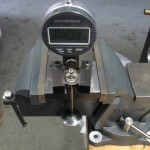
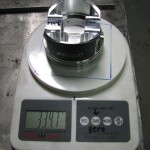
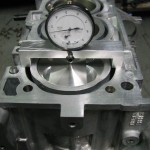
  13. piston dish volume measured and static compression ratio calculated
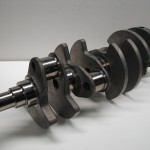
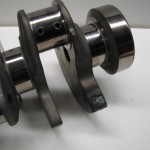
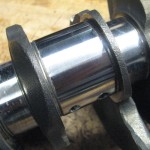
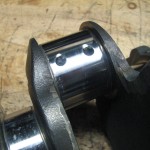
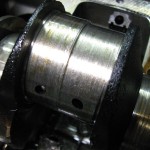
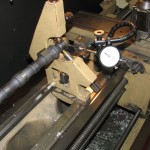
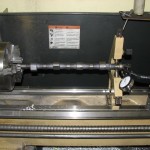
Crankshaft:

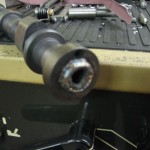
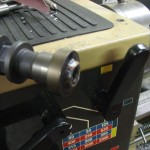
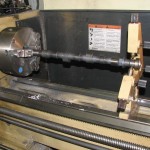
  1. crankshaft washed and micro polished
  2. all journal sizes measured and compared to factory specification
  3. crankshaft found to be in good condition and reused
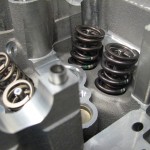
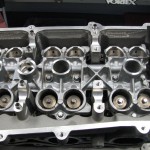
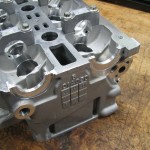
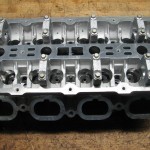
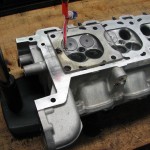
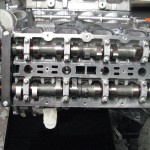
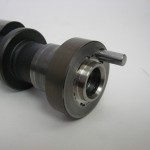
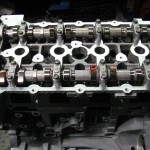
Cylinder heads:

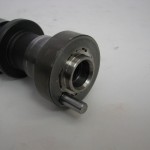
  1. camshaft cleaned, inspected, and journals micro polished
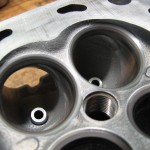
  2. cylinder heads disassembled, cleaned, and inspected
  3. cylinder heads deck milled equal amount and hand stoned with lapping stone to prepare for metal head gaskets
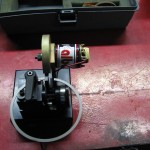
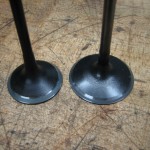
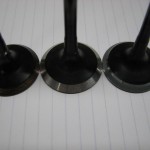
  4. valves reground using Kwik-Way valve refacing machine
  5. valve seats lapped in by hand and sealing checked
  6. cylinder heads reassembled with new valve stem seals
  7. combustion chamber volume measured and static compression ratio calculated
  8. after head installation on block, cylinder leak down checked

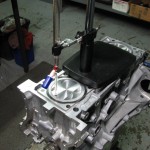
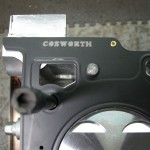
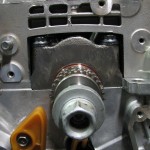
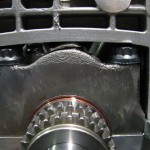
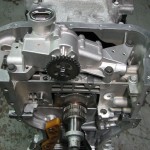
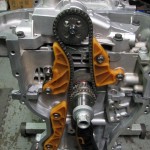
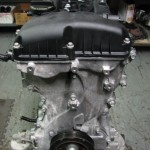
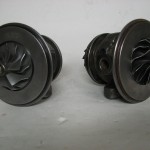
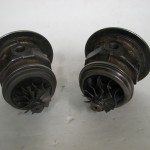
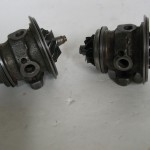
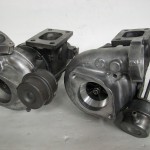
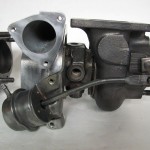
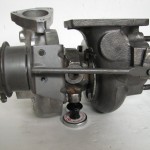
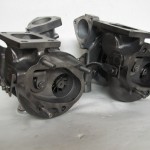
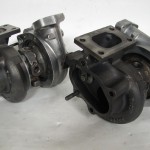
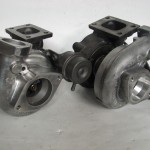
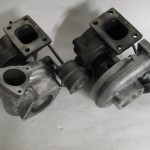
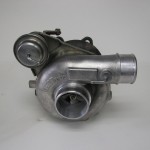
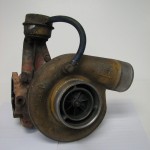
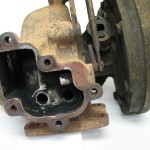
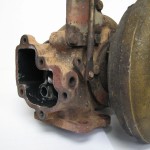
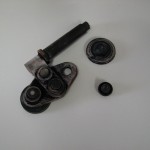
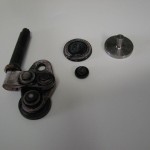
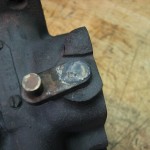
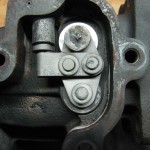
Pictures of the rebuild:

Posted on 3 Comments

2009 Aston Martin Vantage V8 engine rebuild

I would like to document an engine rebuild I did last summer on a 2009 Aston Martin Vantage V8 4.7. Engine was seized due to oil starvation and spun main bearings. Even with all bolts loose on the main bearing girdle and me hanging on a 3 foot breaker bar off the crank pulley it would not turn.

I called Lake Forest Sports Cars in Lake Forest, IL for parts. Right away I was told they can sell me everything needed except engine bearings. Those were not available at all. I could have went next door to Imperial Jaguar but I had a better idea in mind. I contacted ACL bearing company to discuss custom bearing options. In the end of the day I was able to source main and rod bearing in tri-metal contruction from the ACL Race Series.

Original fasteners in the engine were torque to yield design. This means fasteners have to be replaced every time then are tightened and loosened. Official Jaguar and Aston Marin literature suggest main and head studs can only be tightened 2 times before requiring replacement. I contacted ARP for custom fasteners. Head stud option from ARP was possible at a cost of almost $1000 for a set. It did not seem bad for custom made studs but the lead time of almost 10 weeks was a definite turn-off. I talked to ARP about main stud as well and they were of great help. They were able to provide main studs at a very reasonable price and short lead time.

I contacted CP/Carillo for forged piston and connecting rod option. Cylinder bores were worn and AM does not offer an oversize piston option from the dealer. I sent a sample piston, pin, clips, and ring pack to CP for measurements. Three weeks later I had a set of forged piston in 0.5mm oversize. Carillo made a set of connecting rods as well. They are H-beam design and actually lighter weight than the stock powder metal units. Carillo rods were made in custom small end size, crankshaft rod journal was machined in custom size, so that an off-the-shelf ACL Race Series rod bearing could be used.

There was a lot of machining involved in repair of this engine. Oil starvation cause then engine to seize, crankshaft damage, camshaft damage, and cylinder head journal damage.

Block machining:
1. cylinders bored/plateau honed
2. crankshaft main journals align honed

Crankshaft:
1. rod journals spray welded
2. rod journals reground to custom size
3. main journals reground 0.010″ under also for custom size bearings
4. custom wood-ruff key machined from 4140 chrome molybdenum steel used for retaining oil pump gear

Cylinder heads:
1. camshaft journals polished(luckily did not require grinding)
2. cylinder head journals align hone to size(way too much oil clearance)
3. cylinder head machined for exit of align hone mandrel in Bridgeport mill
4. cylinder head plugs machine in a CNC to be used after head is align honed

So far the engine has 2,000 miles and runs flawlessly. The car had to go back to the dealer only to have the transmission recalibrated. Flywheel was lightly resurfaced and the clutch engagement point had to be calibrated by a tech.

Pictures say a 1000 words so I will proceed.

Engine disassembled for inspection to find the following carnage:

Posted on 8 Comments

2009 Jaguar XF Supercharged AJ34S engine rebuild

STORY:

Local luxury car dealership contacted us regarding an engine rebuild for a 2009 Jaguar XF, supercharged model. The engine starved of oil, developed a major rod knock, and spun several main bearings. Complete engine rebuild was in order. Cylinder bores were severely scored and distorted due to lack of lubrication. Custom CP pistons were designed and manufactured specifically for our application and engine bored 0.5mm oversize. Crankshaft rod journal were severely worn and had to be pre-ground, spray welded, and final ground to size. Jaguar does not sell oversize bearings, thus every journal had to be restored to standard OEM size. There was a lot of bearing material in the oil pan and extensive cleaning/flushing necessary before engine reassembly. Engine reassembled using Clevite bearing guard lubricant. Engine break-in performed using Brad Penn 30W “Green Oil”.

PARTS LIST:

  • CP 86.5mm forged pistons, pins, rings, and c-clips
  • OEM parts:
  • oil pump
  • oil pick up tube
  • rod bearings
  • main bearings
  • thrust bearings
  • main bolts, M10 long
  • main bolts, M8 long
  • 3 new connecting rods
  • valve stem seals
  • head gaskets
  • valve cover gaskets
  • front cover gaskets
  • lower oil pan gasket
SERVICES AND MACHINING:
Block
  • Bore/hone block to size
  • Hand stone deck to prepare for metal head gasket
  • Align hone crankshaft main bearing bores
  • Pre-grind, spray weld, final grind crankshaft rod and main journals
  • Balance and micropolish crankshaft
  • Measure all bearing clearances using micrometers and bore gauges
  • File fit piston rings using Childs & Alberts piston ring grinder
  • Replace front and rear main seals
  • Measure piston deck height
  • Measure piston dish volume for compression ratio calculator
Cylinder Head
  • Disassemble, clean, and inspect all components
  • Check all valves for runouts using v-block and dial indicator
  • Reface all valves using IDL valve machine
  • Hand stone deck to prepare for metal head gasket
  • Check valve spring pressure using Rimac valve spring tester
  • Grind valve shims
  • Replace valve stem seals
  • Hand lap all valves and check seal
  • Reassemble heads
  • Measure combustion chamber volume for compression ratio calculator
Pictures of engine build:
Posted on

SR20DET HKS 264 Step 2 camshaft repair

Story:

This camshaft was purchased new by a customer and installed in a high horsepower SR20DET engine built for drifting purposes. Original cause of failure was not clearly determined. Camshaft sprocket retaining bolt may have not been torqued down properly leading to shearing of the camshaft locating pin, camshaft damage, as well as bent engine valves. This camshaft, although brand new, was rendered useless. The shoulder retaining the camshaft sprocket was damaged during the failure. In order to fix this camshaft, the shoulder was TIG welded ensuring only proper penetration and no overheating/warping of the camshaft. After welding the camshaft was mounted in a lathe using a 3 point support. Dial indicator used to zero-set camshaft. After shoulder machining the cam was mounted vertically in a table mill and locating pin bore repaired. During pin shearing failure the bore was damaged and enlarged. Original pin is 6mm with a light press fit. Since the bore was damaged it was decided that a 1/4 inch overbore was necessary for the repair. New hardened pin was machined with a 1/4 inch diameter pressing into the camshaft and a standard 6mm diameter to locate the camshaft gear. Pin was lathe machined using prehardened steel with a Rockwell rating of 40.

Goal:

Repair broken camshaft locating pin and render camshaft usable

Operations:

  1. TIG weld camshaft shoulder
  2. Lathe machine should and restore to standard dimension
  3. Table mill camshaft pin bore to 1/4 pin size with light press fit
  4. Lathe machine new hardened sprocket locating pin
Pictures of work:


Posted on 8 Comments

ARP SR20DET Camshaft Cap Bolt Upgrade Kit

SR20DET Camshaft Cap Bolt Upgrade Kit

ABOUT ARP

ARP is the world leader in fastener technology trusted by the industry’s leading engine builders. When it comes to your build don’t overlook one of the most important parts. Go with the best!

Camshaft positioning is critical on overhead camshaft engines and ARP makes sure that the cam towers are properly secured through use of these durable bolts. They are made from 8740 chrome-moly steel, with threads rolled after heat treat to ensure the optimum fatigue strength; far superior to OEM fasteners. These heat-treated 8740 chrome-moly bolts are nominally rated at 180,000 psi tensile strength to provide a substantial extra margin of safety over Grade 8(Standard) and Class 10.9(Metric) hardware.

WHY DO THIS?

SR20DET engine has a lot of camshafts and valve springs options. Factory M6x1.0 fasteners are designed for use with factory valve springs and cams. Installing aftermarket higher pressure valve springs and high lift performance camshafts will cause the factory camshaft cap retaining bolts to stretch and fatigue over time. This can lead to broken bolts, stripped threads in the cylinder head, and even catastrophic valvetrain failure. This bolt upgrade is similar to upgrading your engine’s head and main bolts. Increased cylinder pressure causes factory designed fasteners to stretch, causing head lift and headgasket failure. To prevent these issues you replace your factory head bolts with higher tensile strength studs. Upgraded valve springs with higher spring pressure than stock causes the same affect by lifting the camshaft out of the journal. This leads to change in journal running clearance, change in oil pressure(due to increased journal clearance), rocker arm gap(which can lead to rocker arm and camshaft lobe wear), and most importantly ignition and valve timing. Camshaft lift problem is amplified in street performance engines running high pressure valve springs and low engine rpm. During low engine speed operation the camshaft lobe spends more time pushing against a stiff springs. This longer impulse contributes to fastener fatigue failure.

EXCEPTIONS

We find this problem present in engines using M6 fasteners. Engines using M8 fasteners experience similar pressures from upgraded valve springs and high lift camshafts, but since the factory fastener already has a great cross-sectional area and higher tensile strength, this upgrade is not necessary.

MATERIALS ANALYSIS

Factory fasteners are M6x1.0 metric bolts with a preload torque rating of 8ft-lb. Using several engineering reference books, bolt dimension, and torque recommended it is possible to determine factory bolt class rating and tensile strength. We found factory bolts to be Class 9.8 rating with a tensile strength of 130,00psi. Our ARP camshaft retention kit is 27% stronger than OEM.

FOOTNOTE:

When changing from factory fasteners to high strength fasteners, clamping force and tolerances will change, therefore it will be necessary to check the bearing bores for proper size and out of round condition after installation of the bolts and align hone the cylinder head camshaft journals if necessary. Camshaft journal bores should always be align honed using the same fasteners and lubricant which will be installed during final engine assembly at the recommended preload.

Posted on 3 Comments

Hyundai Genesis Coupe 2.0T Theta Engine Build

Disassembly and brief look the engine in stock form can be found in this blog entry:  http://pretuning.com/2011/10/hyundai-genesis-coupe-2-0t-4b11-engine-disassembly-and-evaluation/


This is a Hyundai Genesis Coupe engine build I recently completed. As of right now, there are very few performance parts available for the engine. Although the Hyundai Theta 2.0 engine is very similar to the Mitsubishi 4B11T, the only parts that directly cross over are ARP head studs and head gaskets. Engine bearings and connecting rods are different in size and will not work even with extensive modification to either part. Below is a description of the work performed on the engine and part used, both stock and aftermarket. Enjoy!

Engine parts list:

  1. Manley 86.5mm forged pistons
  2. K1 Technologies steel connecting rods, come with ARP 2000 rod bolts
  3. ACL main and rod bearings custom made for application
  4. OEM thrust bearings
  5. ARP main studs, custom made for application
  6. ARP head stud kit, 4B11T part
  7. Cosworth 87mm bore, 1.1mm thick head gasket

Engine machine work performed:

  1. Block bore/hone to 86.5mm
  2. Block align hone with ARP main studs
  3. Balance and polish crankshaft
  4. Weight match rods and pistons
  5. Hand stone block and cylinder head mating surfaces
  6. Inspect cylinder head, hand-lap valves, and check seal

Engine component review:

  • Block– Cylinder block is aluminum construction, die cast, open deck design. Not the best for performance. Mitsubishi 4B11T block is a semi closed deck design with reinforcement at the cylinder head mating surface. This Hyundai block can greatly benefit from a flanged sleeve or a Honda-style girdle to prevent cylinders from walking and distorting under high cylinder pressure condition. Hyundai Theta block utilizes 2 bolt main caps, while Mitsubishi 4B11T utilizes 4 bolt main caps. Piston cooling jets fed from the main oil gallery spray oil on the intake side of the piston.
  • Cylinder head– Excellent design of the head. Direct bucket over valve design unlike 4G63 which was a roller rocker design. 4B11T uses very thin 5.5mm stems on the intake and exhaust valves. 4G63 used 6.5mm stems on intake and exhaust. 4B11T uses very light weight shimless buckets. Intake and exhaust camshaft use an oil pressure controlled vain-type variable valve control system. Early 4G63 had no MIVEC system and late 4G63 only had MIVEC on intake camshaft. 4B11T camshafts are chain driven versus belt drive of the 4G63. Single valve springs utilized in the 4B11T.
  • Oil pump– Oil pump is mounted on the bottom of the upper oil pan girdle and chain driven off the front of the crankshaft. Oil pump is a gear-rotor design with a single stage for pressure. 4G63 used a spur gear style oil pump driven by the timing belt as an auxiliary item.
  • Crankshaft– Crankshaft is forged. It uses smaller rod and main journals than the EVO 10 4B11T version. Rear of the crankshaft has provision for crankshaft position reluctor wheel, which is used by the Mitsubishi 4B11T. Hyundai engine uses the flywheel for crankshaft position. Since the rear of the crankshaft has provisions for the timing sprocket but does not use it, the crankshaft is actually out of balance. The front of the crankshaft was within 2 grams, while the rear was off by 10.5g. This required extensive drilling of the counterweight to correct out of balance. This out of balance can be detrimental to engine bearing life due to crankshaft flex at high engine rpm.
  • Connecting rods– Hyundai engine uses powder steel metallurgy connecting rods. This is a cheap and effective way of production line manufacturing and adequate for the horsepower requirement of a stock factory engine. This type of connecting rod is not adequate for increased horsepower and high rpm engine. Powder steel metallurgy connecting rods usually fail catastrophically in a fracture fashion. Mitsubishi 4B11T engine uses forged steel connecting rods.
  • Pistons– Pistons are cast aluminum using thin, performance-style rings. Stock pistons use a Teflon type of friction coating on the skirts.
  • Gaskets– Stock head gasket is a multi layer steel design using 3 layers. Exhaust manifold gasket is a multi layer stainless steel design. Intake manifold gasket is a single layer metal design.


Posted on

Rebuilding turbos for a nationally ranked auto cross driver

This is a video provided by one of our clients. Mike Gregg races a Nissan 240SX with an SR20DET engine. Mike’s engine suffered oil starvation failure and the ball bearing GT2860R turbocharger failed. Mike sent to us his GT2860R and a T28 turbos for conversions to journal bearing setup. Below is a video of the national competition he attended this summer.


Posted on

Z32 Nissan 300ZX T25 Turbocharger Rebuild Service

PRE Tuning offers rebuilds of Nissan 300ZX T25 turbochargers. These turbos were rebuilt with all new bearings, seals, and o-rings. All bearing and turbine shaft clearances are measured using micrometers and bore gauges. Bearings housing is cleaned prior to inspection. When excessive wear is determined, it is rehoned to accept an oversized turbine shaft bearing. Rotating assembly is polished to remove any imperfections and balanced. Turbine housing is media blasted by hand and polished. After the turbo passes all clearance specification checks it is reassembled.

Compatibility: 1990-1996 Nissan 300ZX Turbo

Pictures of rebuilt turbo:

Posted on

2007 Subaru Impreza STI turbo rebuild IHI VF43

This is an IHI VF43 turbocharger removed from a 2007 Subaru Impreza STI. The turbo was in decent condition to begin with and only needed a complete rebuild kit for the overhaul. Customer complained of minor oil consumption and smoking from the exhaust pipe. Inspection revealed a worn out turbine shaft seal. Complete rebuild was chosen as a solution. If you are already this far in the process why only replace one seal? We replaced all components to make this turbo 100% new. We disassembled the turbo, cleaned all components, and inspected everything. This IHI turbo, like most, suffer from a crack in the wastegate valve are of the turbine housing. After complete inspection bearing clearances were checked using Mitutoyo micrometer and bore gauge. All clearances were within factory specification. Turbocharger rotor shaft assembly was balanced using a Schenck balancing system. This turbo is a perfect example of Basic Turbo Rebuild Service we offer.

Correct turbocharger installation procedure is extremely important for proper operation and life of the product. Majority of Subaru turbocharger failures can be traced to a clogged union bolt filter in the turbo oil feed line. We provide a new union bolt/filter and turbo oil drain gasket at no charge with every Subaru turbo rebuild service. We strive to offer exceptional service and concise solution to our customers.

APPLICATION:

  • 2007 Subaru Impreza STI (EJ257 engine)
  • 2004-2006 Subaru Impreza STI (EJ257 engine)
  • 2002-2006 Subaru Impreza WRX (EJ205 engine)
  • 1998-2002 Subaru Forester (EJ20 or EJ25 turbo engine swap)
  • 2003-2008 Subaru Forester XT (EJ25 engine)

Pictures of the finished product:

Posted on

Caterpillar Industrial Turbo Wastegate Repair

This is a project that came to us yesterday. This turbocharger was removed from an industrial turbo diesel Caterpillar engine. This turbo has a twin scroll turbine housing and utilizes 2 wastegate valves. After heavy use the turbo wastegate valve failed completely and broke off from the flapper arm. This caused the engine to produce almost no boost pressure, rendering the work truck inoperable, costing the company money while out for repairs. Replacement parts for this turbo are not available from Caterpillar or the turbo aftermarket. Only option was turbo replacement, at a cost of $1500. There was nothing wrong with the turbocharger other than wastegate failure and rendering it useless was not an option.

Turbocharger was disassembled and turbine housing media blasted by hand. During disassembly process all 4 retaining bolts sheared off inside the housing despite extensive heating. All broken bolts were drilled out and retapped to proper size. New stainless steel bolts used for mounting of the CHRA to the turbine housing.

We opted to machine our own replacement wastegate valve and perform necessary repairs in a timely manner. New wastegate valve was machined from 304 grade stainless steel in a lather using same dimensions as the other, still functional, valve. New valve was welded to the flapper arm allowing for motion same as original one. The flapper arm was reinstalled in the turbine housing and welded to the actuator level arm. Turbocharger was reassembled and proper wastegate actuator operation confirmed.

Turnaround time for repair was one day; even less than ordering a new turbo!

Below you will find pictures of the repair process: