Posted on

Differential welding service Mazda Miata

This is a differential we welded for a local drifter. The car is a Mazda Miata. Stock open differential would not work at all and a Torsen differential was too unpredictable for the customer’s liking. This open differential was supplied for welding services. Our differential welding service is different from most people. While most think it is acceptable to remove the back cover, “degrease” the gears with brake cleaner, and proceed with welding, we do not think this is a reliable solution. Our differential welding service involves complete disassembly of the differential, washing and inspecting of components, and reassembly. We check gear backlash before disassembly and afterwards. If it is our of spec, we fix this as well.

We offer this type of differential welding service for $150.

Goal:

  • Weld differential
Labor:
  • Remove differential cover and check gear backlash before disassmebly
  • Label all components and disassemble differential, remove ring gear
  • Clean all components in a parts washer
  • Inspect all components for wear
  • Weld differential
  • Reassembled differential and check gear backlash
Pictures of the process. Click an image for details.
Posted on

Differential welding service Lexus SC300 SC400

This is a differential we welded for a local drifter. The car is a 1997 Lexus SC300 5spd. Stock open differential would not work at all and a Torsen differential was too unpredictable for the customer’s liking. This open differential was supplied for welding services. Our differential welding service is different from most people. While most think it is acceptable to remove the back cover, “degrease” the gears with brake cleaner, and proceed with welding, we do not think this is a reliable solution. Our differential welding service involves complete disassembly of the differential, washing and inspecting of components, and reassembly. We check gear backlash before disassembly and afterwards. If it is our of spec, we fix this as well.

We offer this type of differential welding service for $150.

Goal:

  • Weld differential
Labor:
  • Remove differential cover and check gear backlash before disassmebly
  • Label all components and disassemble differential, remove ring gear
  • Clean all components in a parts washer
  • Inspect all components for wear
  • Weld differential
  • Reassembled differential and check gear backlash
Pictures of the process. Click an image for details.
Posted on

DIY: Z32 Nissan 300ZX caliper rebuild and service

Today we show the process of rebuild a set of calipers off a Z32 Nissan 300ZX. These calipers were removed from a 1990 300zx, so they are all aluminum front calipers meant to be used with 26mm wide rotors. The rebuild process for all 300ZX calipers will be the same. We rebuilt both front and rear calipers. master cylinder rebuild procedure coming soon.

We can perform the following service at a cost of $200/pair. This price includes the cost of parts, paint, and labor.

Goals:

  • Rebuild front and rear calipers
  • Improve caliper appearance
Parts:
  • OEM Nissan front and rear caliper rebuild kits(seals, o-rings, dust boots, retainers, and grease)
Labor:
  • Disassemble front and rear calipers(remove c-clips, dust boots, pistons, o-rings)
  • Degrease all components in parts washer
  • Mask off piston bores in each caliper half and media blast completely
  • Mask off piston outer surface  and media blast inside of the piston and dust boot mating area
  • Clean caliper halves in parts washer after media blasting
  • Mask off calipers again and prepare for painting with high temperature ceramic paint(powder coating is optional)
  • Reassemble calipers with new OEM rebuild kits.
Below are pictures of the rebuild process:
Posted on

Hyundai Genesis Coupe 2.0T Theta Engine ARP Main Stud Kit

We would like to announce the development of a main stud kit for the Hyundai Genesis Coupe Theta I4 engine. Theta I4 engine is very similar to the Mitsubishi 4B11T engine. This kit was developed because no such application was available in the aftermarket performance industry. This kit was custom developed in a collaboration between Pavel’s Racing Engines and ARP, the world leader in performance fastener technology.

This ARP2000 main stud kit includes a set of ten ARP2000 main studs and ten 8740 chrome moly steel 12 pt nuts and a 1/2 oz. pack of ARP Ultra-Torque fastener assembly lubricant. All Pro Series ARP2000 studs are centerless ground, heat treated prior to thread rolling and machining, and are nominally rated at 220,000 psi. These fasteners deliver a 50% increase in tensile strength over the OEM main bolts. Additionally, main studs utilize a base seating feature to evenly distribute maximum load on the stud and not the threads. This feature is typically found only in high level race engines. This is the pointed, pilot tip, at the end of the stud.

Advantages of having ARP main stud kit over using factory bolts:

  • more accurate torquing of the fastener(ARP studs, unlike bolts, do not twist during the torquing process, thus giving you a more accurate reading than traditional bolts that twist during tightening.)
  • reduction of main cap walk(Main cap walk occurs when great combustion loads force the crankshaft downwards against the cap, causing it to lift off the block mating surface and shift out of alignment.)
  • reduction of main cap fretting(Fretting is micro-motion between the main bearing cap and block that results in material loss at the joint. This motion causes a loss of crankshaft to main bearing running clearance that can lead to a spun main bearing, a spun connecting rod bearing, and/or a broken crankshaft.)
  • more consistent alignment of main caps(ARP studs installed prior to crankshaft and main cap installation helps with alignment and seating.)
  • faster and more accurate assembly and disassembly of the engine
This is the picture of the kit we developed:
Posted on

Engine Break-in Instructions

Pavel’s Racing Engines recommends the following engine break-in instructions to all of our engine customers. The following procedure is a compilation of information collected over the years from very reputable sources such a TRD Formula Atlantic, VW SuperVee, and World Champion snowmobile engine builders. We have had zero engine failures due to using this engine break-in procedure.

Engine Break-in Procedure

(Some points may not apply to your engine)

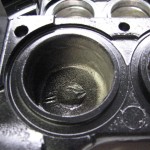
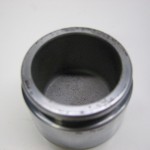
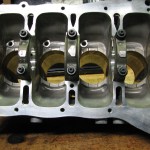
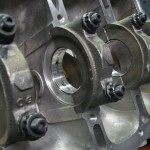
To ensure long life and reliability you must properly break in your freshly assembled engine. Most critical engine break-in and piston ring seating occurs within the first twenty miles of driving. Proper break in ensures higher compression, less oil consumption, less blow-by, and most importantly longer engine life.

For high performance motors, fill with good grade mineral oil. NEVER USE SYNTHETIC OIL FOR ENGINE BREAK-IN!

Composite fiber/graphite head gasket need to be re-torqued after heat cycling the engine. Multi layer steel head gaskets do not require to be re-torqued.

Valve lash needs to be checked and/or adjusted on solid lifter motors only. Hydraulic lifter engines are exempt from this step. Make sure hydraulic lifters were bled properly prior to engine assembly. Certain applications allow for hydraulic lifter bleeding with the engine running, while others do not allow for such procedure at all. Reference manufacturers service manual for specific information pertinent to your application. Adjustment on bucket style solid lifter systems is not necessary in most cases. Adjustable rocker arm lifter system commonly found on Honda engines needs to be checked and/or adjusted after initial engine run-in.

Engine break-in oils such as Valvoline or Brad Penn should be used when possible. Use straight 30W engine break-in engine oil. When break-in oil is not available fill the engine with good grade 20W-50 mineral based oil.

Always use new spark plugs in your engine.

Fill the oil filter with oil before installing it. Remove the spark plugs and crank the engine until proper oil pressure shows on the gauge. Re-install the spark plugs. Now you are ready to start the engine.

Start the engine and check for leaks. Make sure the vehicle is completely operable for its first run. Warm up the engine completely. After 15 minutes stop the engine, check the valve lash and re-torque the head bolts. Drain the oil and change the filter. Re-fill the engine with 20W-50 mineral based oil.

You will be driving the engine hard to ensure proper ring seating. It is best to perform engine break-in on the dyno or a race track. Do not attempt to race the engine on the street. This puts yourself and others around you in danger.

Street break-in: Warm up the engine completely. Drive at slow vehicle speeds with a lot of throttle opening in 2-4 gears at high engine RPM. Don’t lug the engine because that is worse for the motor than over revving it. Low engine RPM and high throttle opening is bad for your engine. Do so in burst of acceleration and deceleration. Do not run the engine at a constant engine speed. This can cause piston ring glazing.

Racetrack break-in: Warm up the engine completely. Do one easy lap to warm up the tires. Go back to the pit and check for leaks or any problems. If everything checks out, take a normal 15 minute practice session and check water temperature frequently. The racetrack is a perfect place to break in the engine. The combination of acceleration and deceleration is exactly what you need for optimal piston ring seal.

It may be useful to cut open used filters and inspect for metal particles and shavings after initial engine break-in run.

After 500 miles change the oil and filter again. You can now use synthetic oil if you want to. Use 20W-50 oil and change it every 3,000 miles. Your engine is now broken in.

Any questions please contact us for technical assistance. Thank you for your business!

Posted on

Turbocharger Installation Instructions

TURBO INSTALLATION INSTRUCTIONS

(All items may not apply to your application.)

READ THIS FIRST!

PRIOR TO ATTEMPTING A TURBOCHARGER INSTALLATION YOU MUST COMPLETELY READ AND UNDERSTAND THE INSTRUCTIONS. IF YOU HAVE ANY QUESTIONS PLEASE CONTACT US FOR TECHNICAL SUPPORT.

When installing a turbocharger, you must observe the following instructions:

  • Change oil and filter prior to turbocharger installation. Vehicles equipped with engine oil coolers, ensure oil cooler was flushed or replace after engine or turbo failure, as debris left in the cooler may reenter the engine and/or turbo and produce another consequent failure.
  • Install clean air filter and ensure entire intake system is clear of debris and foreign object. Proper air intake system with no external leaks is crucial.
  • Inspect and clean all turbocharger lines. This includes oil feed and return, as well as water feed and return, if applicable. Check oil lines for any restrictions, such as deposits, kinks, sharp bends, etc. If banjo bolts are used make sure they are clean of any restrictions. New oil lines are highly recommended with a new turbocharger installation.
  • All water and oil line connections must be utilized on the turbocharger as designed by the manufacturer. Using a water cooled and oil lubricated turbocharger without water cooling can result in premature failure, can be detected during turbocharger failure analysis, and WILL void the warranty.
  • Use new, high quality gasket at various turbo connections (oil, water, intake, exhaust). DO NOT use sealing compounds, such as RTV gasket-making silicone, at any oil connections.
  • Make sure oil return line is clean and free of any restrictions (kinks and/or sharp bends). Maintain a reasonable size drain tube diameter throughout the entire length of the turbocharger oil return line. Maintain a tube size diameter of 7/16” to ½” for most popular turbochargers, such as, but not limited to Garrett T2/T25/T28/T3/T4, IHI VF-series, Toyota CT-series, and MHI TD04/TD05/TD06. Turbo oil drain line must enter the engine above engine oil level. Turbo oil drain line should not tilt more than 20 degree from vertical in either direction. Excess tilting of the oil drain line can cause oil drain restriction and leakage at both compressor and turbine seals.
  • If angular orientation of the compressor and/or turbine housing is necessary, loosen the clamp plates and/or V-band clamps. After completing re-orientation, ensure mating flanges are tightly reseated and all fasteners retightened.
  • Re-orientation must be completed prior to making any rigid connections to the compressor and turbine inlets and outlets. Failure to do this will cause external stresses acting on the turbocharger unit and possible failure.
  • Do not install the CHRA (Center Housing Rotating Assembly) in a damaged compressor or turbine housing. Turbine housings cracked in the turbine wheel area may expand at operating temperatures and contact the turbine wheel, causing damage and/or complete turbocharger failure.
  • Turbocharger internal waste gate system, if applicable, must remain operable and MAY NOT be disconnected or modified.
  • Ensure engine breather system is clear and fully operational. Replacement of PCV (Positive Crankcase Ventilation) valve is highly recommended at the time of turbocharger replacement.
  • Ensure exhaust system is free of any restrictions which may cause excessive backpressure.
  • Ensure steady stream of oil flows from the turbo return line prior to starting the vehicle by cranking, but not firing, the vehicle and watching the disconnected turbo oil return line.
  • Start and idle the engine for three minutes after initial turbocharger installation.
  • Observe and maintain all oil and filter change intervals as advised by the vehicle manufacturer. Always idle the vehicle for at least 3 minute prior to shut down. Turbo timer installation is highly recommended to help maintain and extend turbocharger life.


If you have any questions, suggestions, or concerns, please contact us. We truly appreciate your business!

Posted on 2 Comments

Conversion of Ball Bearing Turbos

Most people know ball bearing turbochargers cannot be rebuilt. Manufacturers do not sell parts to service these unit leaving customers with damaged turbochargers no options other than keeping it as an expensive paper weight or send it in through an exchange program. Garrett charges between $800-900 US dollars for a new replacement CHRA, this being almost the price of a new turbo. In comparison, ball bearing turbocharger spool up faster but operating costs and eventual failure will leave you with no option but replacement.

At PRE we offer a turbocharger conversion service. We can convert your damaged, unusable ball bearing turbocharger to journal bearing configuration. So far we developed a viable solution for Garrett T-series and GT-series turbochargers.

Right now we can convert the following turbos:

  • -T28
  • -GT2560R
  • -GT2860R
  • -GT2871R
  • -GT28R
  • -GT28RS

Most popular option we offer is 0.64A/R turbine housing. We can also supply necessary parts for a 0.86A/R turbine housing modification.

This is a recent conversion we did for an autocross national championship contender customer in Idaho. His Garrett GT2860R turbo failed. We were able to rebuild it using our conversion process. Last 3 pictures are S14 Nissan Silvia T28 conversion.